


What’s Actually in Your Tap Water (And Why It Matters)
Before you can pick the right filter, you need to understand what you’re filtering out. Most municipal water in the U.S. meets EPA standards, but “meets standards” and “is perfectly clean” are two very different things.
Water treatment plants do a solid job with the big stuff. But by the time that water travels through aging infrastructure and into your home, it can pick up things you’d rather not drink.
Common Contaminants Found in Household Water
Let’s start with the usual suspects. Chlorine and chloramine are added intentionally to disinfect water during treatment. They’re effective at killing bacteria, but they leave behind a taste and smell that many people find unpleasant, and some studies suggest long-term exposure to chlorine byproducts (called trihalomethanes) deserves attention.
Then there’s lead. If your home was built before 1986, there’s a real chance your plumbing contains lead solder or lead service lines. The crisis in Flint, Michigan brought this into the national conversation, but lead contamination isn’t limited to one city. It’s a widespread infrastructure problem.
PFAS, sometimes called “forever chemicals”, are another growing concern. These synthetic compounds show up in water supplies near industrial sites and military bases, and they don’t break down naturally. The EPA has been tightening PFAS limits, with enforceable standards finalized in 2024, but many water systems are still catching up.
Other contaminants you might encounter include nitrates (common in agricultural areas), sediment and rust particles (especially in older homes), volatile organic compounds (VOCs) from industrial runoff, and varying levels of arsenic, fluoride, and pharmaceutical traces.
The mix depends entirely on where you live and how old your plumbing is.
How to Test Your Home’s Water Quality
Here’s my honest advice: don’t guess. Test.
If you’re on a municipal supply, your water utility publishes an annual Consumer Confidence Report (CCR). You can find yours on the EPA’s website or by calling your provider. It’ll tell you what contaminants were detected and at what levels.
But the CCR reflects water at the treatment plant, not at your faucet. For a more accurate picture, I’d suggest getting a home water test kit. Basic ones from hardware stores run about $15–$30 and cover pH, hardness, chlorine, lead, and a few other parameters.
If you want the full picture, especially for things like PFAS, VOCs, or heavy metals, consider sending a sample to a certified lab. Companies like Tap Score and SimpleLab offer comprehensive mail-in testing for around $100–$200. It’s not cheap, but it gives you actual data to make a smart decision instead of buying a filter based on marketing claims.
For well water users, regular testing is even more critical since there’s no municipal treatment happening upstream. The CDC recommends testing private wells at least once a year for bacteria and nitrates, and more frequently if you notice changes in taste, color, or odor.
How Home Water Filtration Systems Work
Once you know what’s in your water, the next question is straightforward: how do you get it out? There are three major filtration technologies that cover the vast majority of residential needs. Each works differently, targets different contaminants, and comes with its own trade-offs.
Activated Carbon Filters
This is the technology inside your Brita pitcher, your fridge filter, and most faucet-mounted units. It’s also the most common and least expensive option on the market.
Activated carbon works through adsorption, not absorption. The carbon has a massive internal surface area (a single gram can have the surface area of a tennis court), and contaminants stick to it as water passes through. It’s particularly good at removing chlorine, sediment, VOCs, and improving taste and odor.
What it doesn’t do well: removing dissolved minerals, heavy metals like lead (unless it’s a specialized carbon block), fluoride, nitrates, or PFAS. Some higher-end carbon block filters can handle lead and certain PFAS compounds, but you need to check the certification, look for NSF/ANSI 53 for lead and NSF/ANSI P473 for PFAS.
The big advantage of carbon filters is simplicity. They’re affordable, easy to install, and require minimal maintenance beyond replacing the cartridge every two to six months depending on usage. The downside is they’re limited in scope. If your water test reveals serious contamination, carbon alone probably won’t cut it.
Reverse Osmosis Systems
Reverse osmosis (RO) is the heavy hitter. If activated carbon is a fine mesh net, RO is more like a molecular sieve.
It works by pushing water through a semipermeable membrane with pores so tiny that most dissolved contaminants can’t pass through. We’re talking about removing 95–99% of dissolved solids, including lead, arsenic, fluoride, nitrates, PFAS, sodium, and much more.
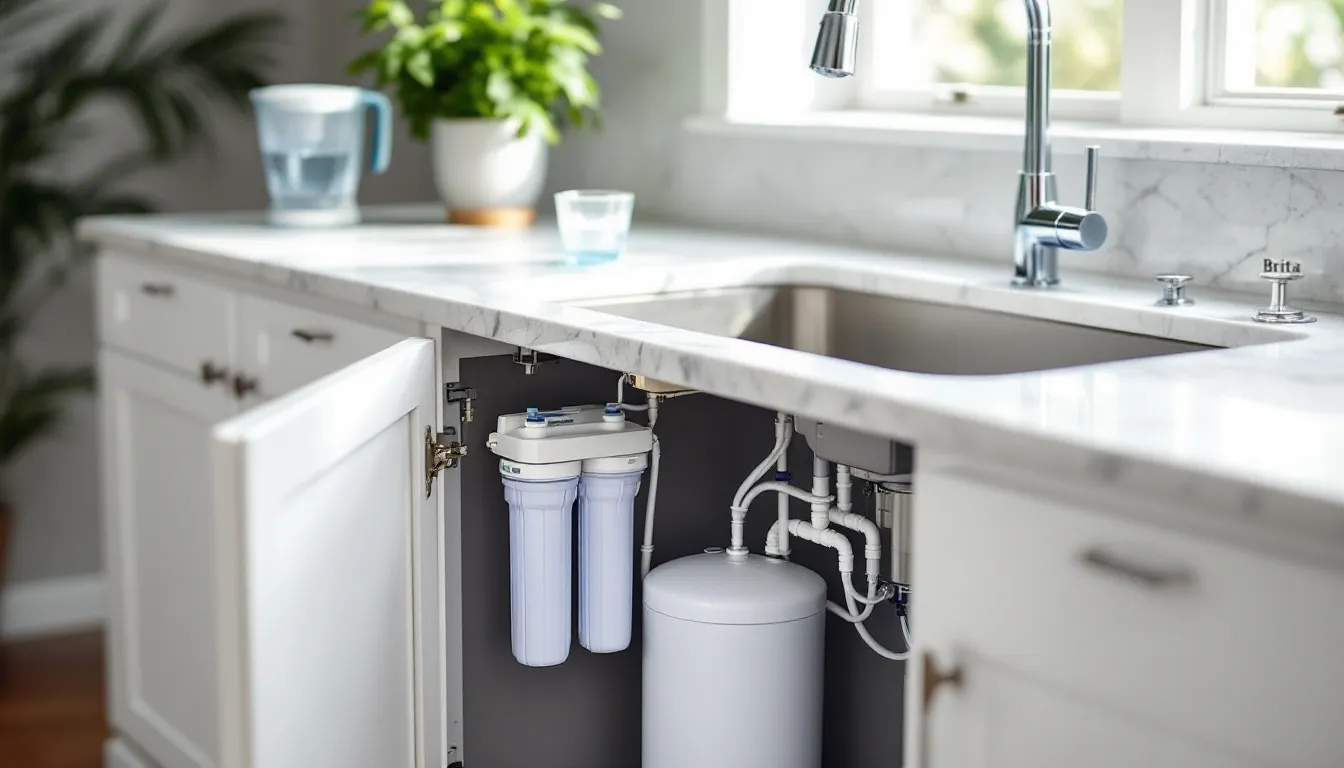
Most home RO systems are installed under the kitchen sink and include multiple stages: a sediment pre-filter, the RO membrane, an activated carbon post-filter, and a storage tank. The whole setup runs $150–$600 for a quality unit, plus $50–$100 per year in replacement filters.
The trade-offs are real, though. RO systems produce wastewater, typically 2–4 gallons of reject water for every gallon of filtered water, though newer models with permeate pumps have improved that ratio significantly. They also strip out beneficial minerals along with the bad stuff, which some people address by adding a remineralization stage.
And they’re slow. You’re not getting instant filtered water on demand: you’re drawing from a pressurized tank that refills gradually.
UV Purification
Ultraviolet purification takes a completely different approach. Instead of filtering particles out, it neutralizes biological threats, bacteria, viruses, and parasites like Giardia and Cryptosporidium, by scrambling their DNA with UV-C light.
This makes UV an excellent choice for well water or any supply where microbial contamination is a concern. It’s chemical-free, doesn’t alter the taste of water, and works quickly.
But here’s the catch: UV does nothing for chemical contaminants, heavy metals, chlorine, or sediment. It’s a disinfection tool, not a filtration tool. That’s why UV is almost always paired with another filtration method, typically a sediment pre-filter and a carbon filter. The UV lamp itself needs replacement about once a year, running $30–$80 depending on the brand.
For municipal water users, UV is generally unnecessary since the water is already disinfected. It’s most valuable for well owners or anyone with a known biological contamination risk.
Whole-House vs. Point-of-Use Filters: Which Setup Makes Sense for You
This is where I see a lot of people get stuck, and honestly, I went back and forth on it myself.
A whole-house system (also called point-of-entry) installs where the main water line enters your home. Every faucet, shower, and appliance gets filtered water. These typically use large carbon filters or multi-stage setups, and they’re great for removing chlorine, sediment, and improving water throughout the house. If hard water or sediment is your primary issue, a whole-house system paired with a water softener can be a game-changer.
Cost-wise, you’re looking at $300–$1,500 for the unit plus professional installation, which can add another $200–$500. Filter replacements run every 3–12 months depending on the system and your water usage.
A point-of-use system filters water at a single location, usually the kitchen sink. Under-sink RO systems, countertop filters, and faucet-mounted units all fall into this category. They tend to provide higher quality filtration than whole-house systems because they’re treating a smaller volume of water and can use finer filtration technology.
So which makes sense? It depends on your priorities.
If you’re mainly concerned about drinking and cooking water quality, a point-of-use system, especially an under-sink RO or high-quality carbon block, gives you the best bang for your buck. If you’re bothered by chlorine smell in showers, hard water spots on dishes, or sediment throughout the house, a whole-house system addresses those comfort issues.
Many people end up doing both: a whole-house carbon filter for general improvement, and an under-sink RO for the water they actually drink. It’s not the cheapest path, but it’s thorough.
Comparing Cost, Maintenance, and Performance Across Filter Types
I’ve put together a comparison here because seeing the numbers side by side makes the decision much clearer.
Pitcher/Carafe Filters (Brita, PUR, etc.)
Upfront cost: $20–$45. Annual filter cost: $40–$70. Removes chlorine, some lead (certified models), taste/odor. Doesn’t remove PFAS, nitrates, most heavy metals. Maintenance is dead simple, just swap the cartridge every 2 months.
Faucet-Mounted Filters
Upfront cost: $20–$50. Annual filter cost: $30–$60. Similar performance to pitchers, slightly more convenient since you don’t have to refill anything. Some models achieve NSF 53 certification for lead. They can slow your flow rate, and they don’t fit every faucet style.
Under-Sink Carbon Block
Upfront cost: $50–$200. Annual filter cost: $30–$80. Better contaminant removal than pitchers, especially for lead and cysts. Out of sight, decent flow rate, but requires a bit of DIY installation.
Under-Sink Reverse Osmosis
Upfront cost: $150–$600. Annual filter cost: $50–$100. Removes the widest range of contaminants. The gold standard for drinking water purity. Drawbacks include wastewater production, slower output, and mineral removal.
Whole-House Carbon
Upfront cost: $300–$1,000 (plus installation). Annual filter cost: $100–$300. Great for chlorine, sediment, and general water quality improvement throughout the home. Won’t handle dissolved contaminants as thoroughly as RO.
UV Disinfection
Upfront cost: $100–$400. Annual lamp replacement: $30–$80. Excellent for microbial threats: useless for chemicals. Best as an add-on, not a standalone solution.
The pattern I notice is this: the more comprehensive the filtration, the higher the upfront and ongoing costs. But consider what you’re comparing it to. A family spending $50/month on bottled water is already paying $600/year, more than most filtration systems cost to run.
Mistakes to Avoid When Choosing a Water Filtration System
I’ve watched friends and family members make these mistakes, and I’ve made a couple myself. Here’s what I’d steer you away from.
Buying a filter before testing your water. This is the biggest one. You wouldn’t buy prescription glasses without an eye exam, right? A $40 test kit can save you from spending $400 on the wrong system.
Assuming all filters are created equal. A cheap pitcher filter and a certified carbon block filter are not doing the same job, even if they both say “reduces contaminants” on the box. Look for NSF certifications, they’re the gold standard for verifying that a filter actually does what it claims. No certification? Be skeptical.
Ignoring filter replacement schedules. An expired filter isn’t just ineffective: it can actually become a breeding ground for bacteria or release trapped contaminants back into your water. Set a reminder, mark your calendar, whatever works, just don’t forget.
Over-buying for your situation. If your municipal water is generally clean and your main complaint is chlorine taste, you don’t need a $500 RO system. A solid carbon filter will handle that beautifully at a fraction of the price. Match the tool to the problem.
Forgetting about water pressure. RO systems and some whole-house units need adequate water pressure to function properly. If your home has low pressure (below 40 PSI), you may need a booster pump, which adds cost and complexity.
How to Match the Right Filter to Your Specific Water Problem
Let me make this as practical as possible. Start with your test results, then work backward.
If your main issue is taste and odor (chlorine, musty smell): An activated carbon filter, pitcher, faucet-mounted, or under-sink, will likely solve it. This is the easiest and cheapest fix. Almost any carbon filter with NSF 42 certification handles taste and odor effectively.
If you’re dealing with lead: You need a filter specifically certified for lead removal under NSF/ANSI 53. Many carbon block filters and all quality RO systems qualify. Don’t assume a basic pitcher handles lead unless the specific model is certified for it.
If PFAS are a concern: This is trickier. Reverse osmosis is your most reliable option here, studies consistently show RO removes 90%+ of PFAS compounds. Some activated carbon filters (particularly granular activated carbon with long contact times) reduce PFAS as well, but performance varies. Look for NSF P473 certification.
If you’re on well water with bacterial concerns: UV purification paired with sediment and carbon pre-filtration gives you solid protection. If your well also has high mineral content or chemical contamination, add an RO stage.
If hard water is your problem (scale buildup, dry skin, spots on dishes): Filtration alone won’t fix this. You need a water softener, which uses ion exchange to remove calcium and magnesium. Some people pair a softener with a whole-house carbon filter for the best of both worlds.
If you want the most comprehensive protection possible: A whole-house sediment/carbon filter plus an under-sink RO system for drinking water covers nearly every base. Add UV if microbial contamination is a factor. Yes, it’s the most expensive approach, but it’s also the most thorough.
One more thought: don’t overlook the value of reading your water utility’s CCR and doing a home test. The CCR tells you what’s in the water supply: the home test tells you what’s coming out of your specific faucet. The difference can be significant, especially in older homes.
Conclusion
Picking a water filtration system doesn’t have to feel overwhelming. The formula is actually pretty straightforward: test your water, understand what needs to come out, and choose the technology that matches.
You don’t need the most expensive system on the market. You need the right system for your water, your household, and your budget. Sometimes that’s a $25 pitcher. Sometimes it’s an under-sink RO. Both are valid, as long as the choice is based on data, not marketing.
I genuinely believe that clean drinking water is one of those small investments that compounds over time. It’s easy to ignore because tap water is mostly invisible, you turn on the faucet and it’s just… there. But once you’ve tasted the difference and understood what you’re keeping out of your body, it’s hard to go back.
If you found this helpful, I’d love for you to share it with someone who’s been on the fence about filtration. And if you’ve already made the switch, drop a comment, I’m curious what system you went with and how it’s working out for you.
This article is for informational purposes and general education, not medical advice. If you have specific health concerns about your water supply or are managing a health condition, consult a qualified professional.